

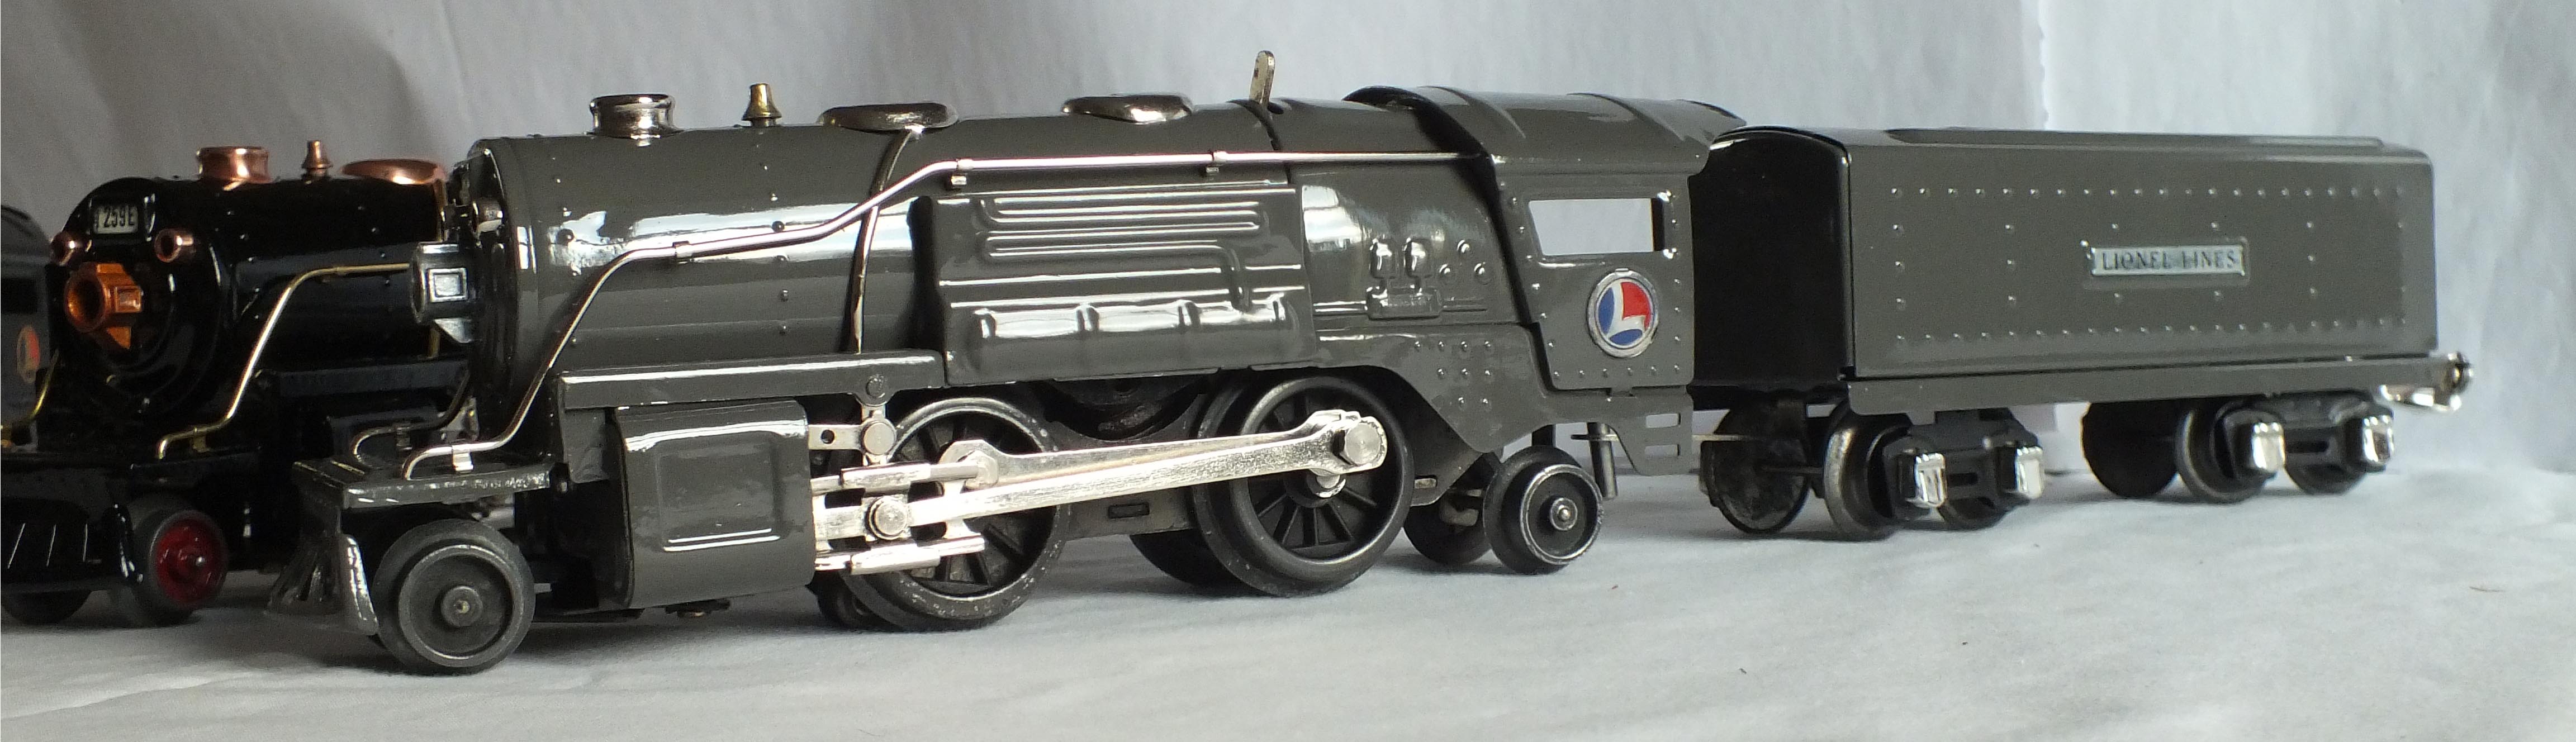
Unrestored black 259 and gunmetal tender
Early in 2014 I was contacted by a Lionel collector looking to have three versions of the Lionel 259 2-4-2 restored. These were a gunmetal and nickel 259E; black and copper 259E; black and nickel 259.
The black versions had been re-wheeled, but otherwise original.
The 261T (tender) had a missing rear handrail.

Incorrect metallic finish & black smokebox
The gunmetal version had been repainted twice, latterly with metallic paint and had been given a black smokebox. Four of the handrail knobs were missing which had been replaced with split pins.
Over the years they had all suffered from poor storage allowing rust to take hold on the nickel plated steel whilst handling with bare hands had removed the nickel plating on dome covers, handrails and connecting rods.
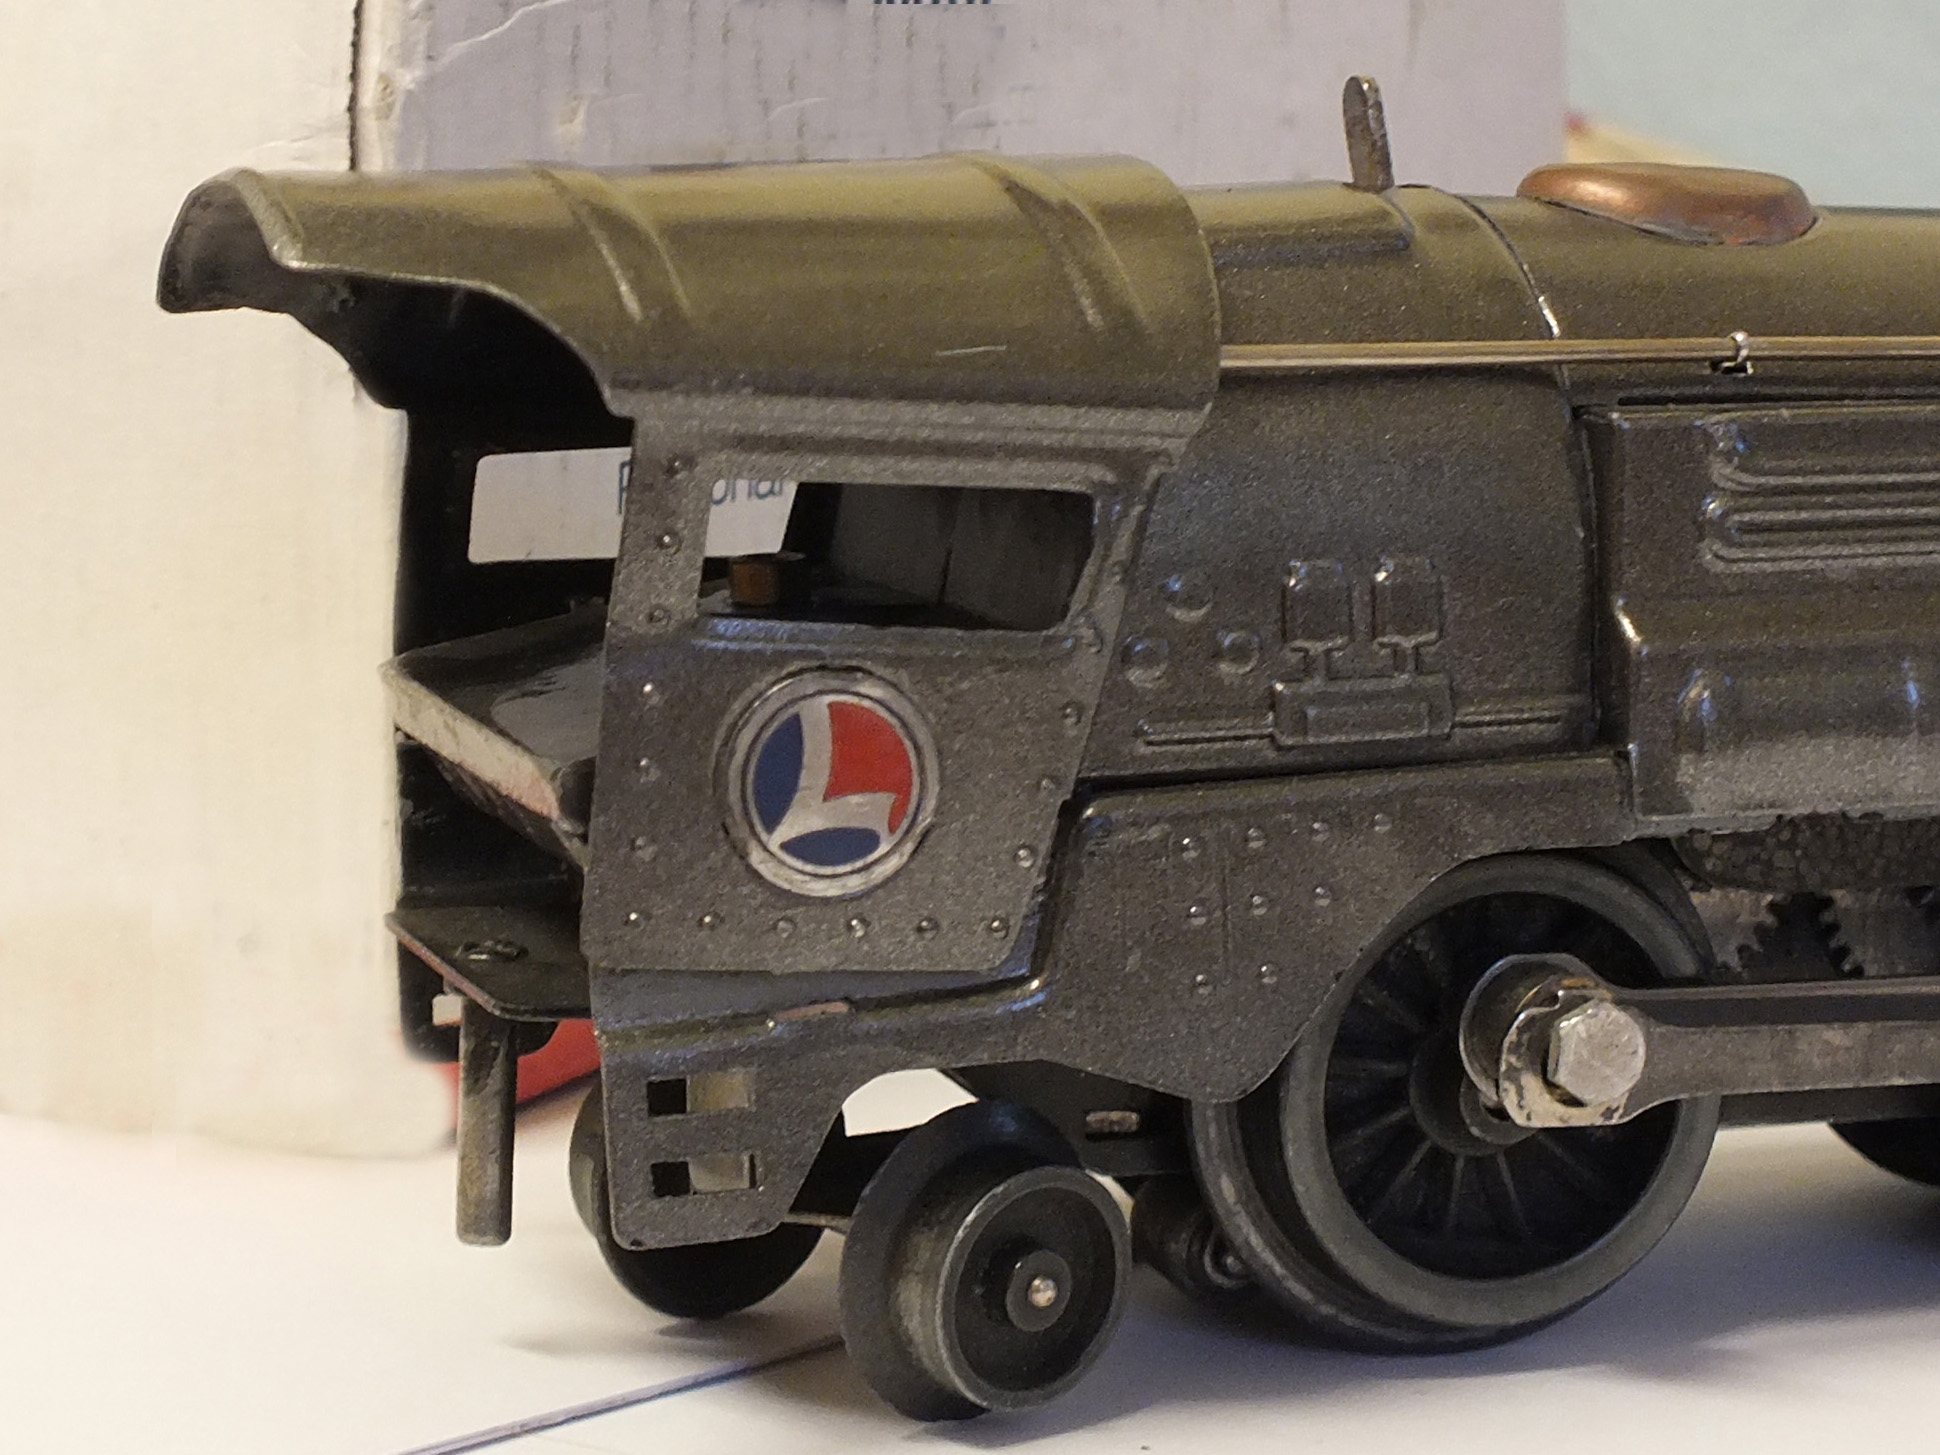
Gunmetal 259E with damaged cab
At some point during transit Parcelforce had managed to crush the cab.
One of the tabs on the cab bottom was missing preventing it from sitting properly.
All the mechanisms worked, but one of the E-Units required some remedial work to repair an earlier dismantling.
In this narrative I am going to concentrate on the restoration of the bodies which fell into these steps:
1. Dismantle completely the body work into all basic component parts. That meant removal of everything with two exceptions; the bells and headlights which were riveted on in such a way that removal would irretrievably damage them and the guide bars were left attached to the cylinders as they could be painted and re-plated in situ.
2. Strip the bodies of all existing paint.
3. Strip all remaining nickel plating.
4. Match the gunmetal colour in a non metallic, brushable paint.
5. Repair a badly corroded tender bodyside on the black 261T.
6. De-rust.
7. Paint the bodies.
8. Make replacements for the missing handrail knobs and the tender handrail.
9. Re-nickel all motion work, axle boxes, couplers and on the nickel versions all dome covers, chimneys, pilot lights, handrails, sand pipes.
10. Polish and varnish the copper versions dome covers, chimneys, pilot lights, handrails, sand pipes.
11. Reassemble.
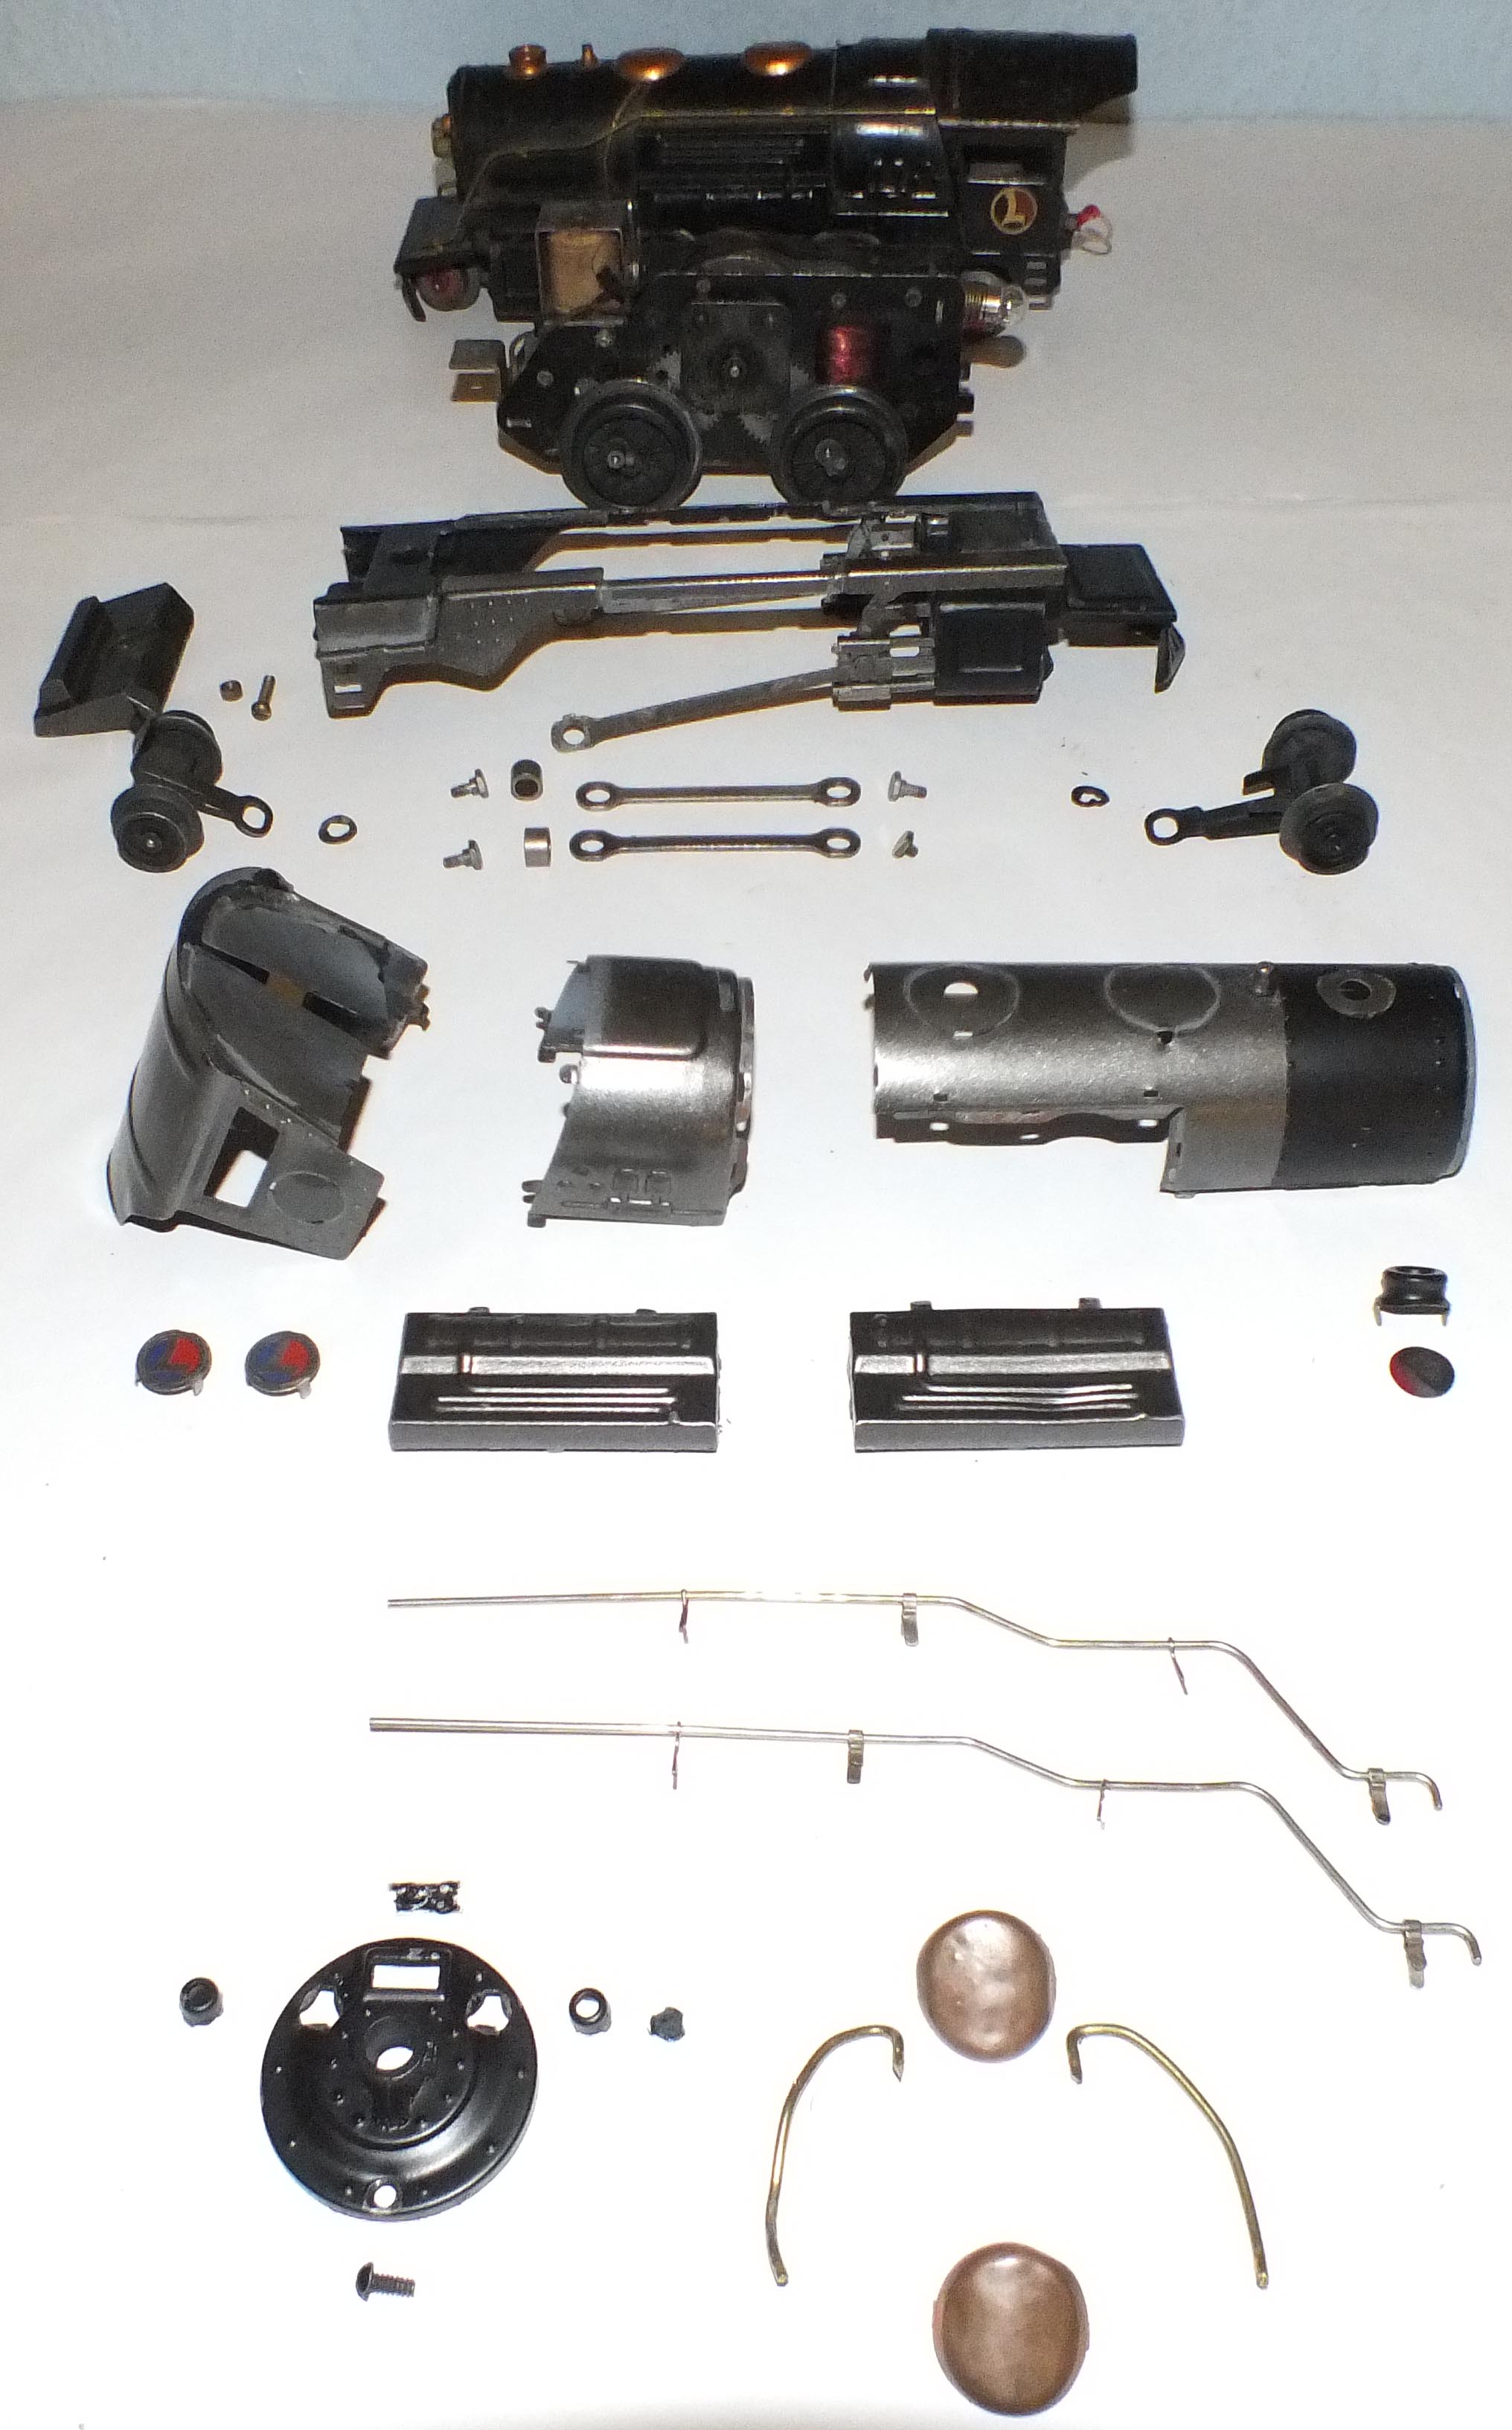
Component parts of a Lionel 259E
In summary the work progressed as follows:

Damaged Cab ready for repair
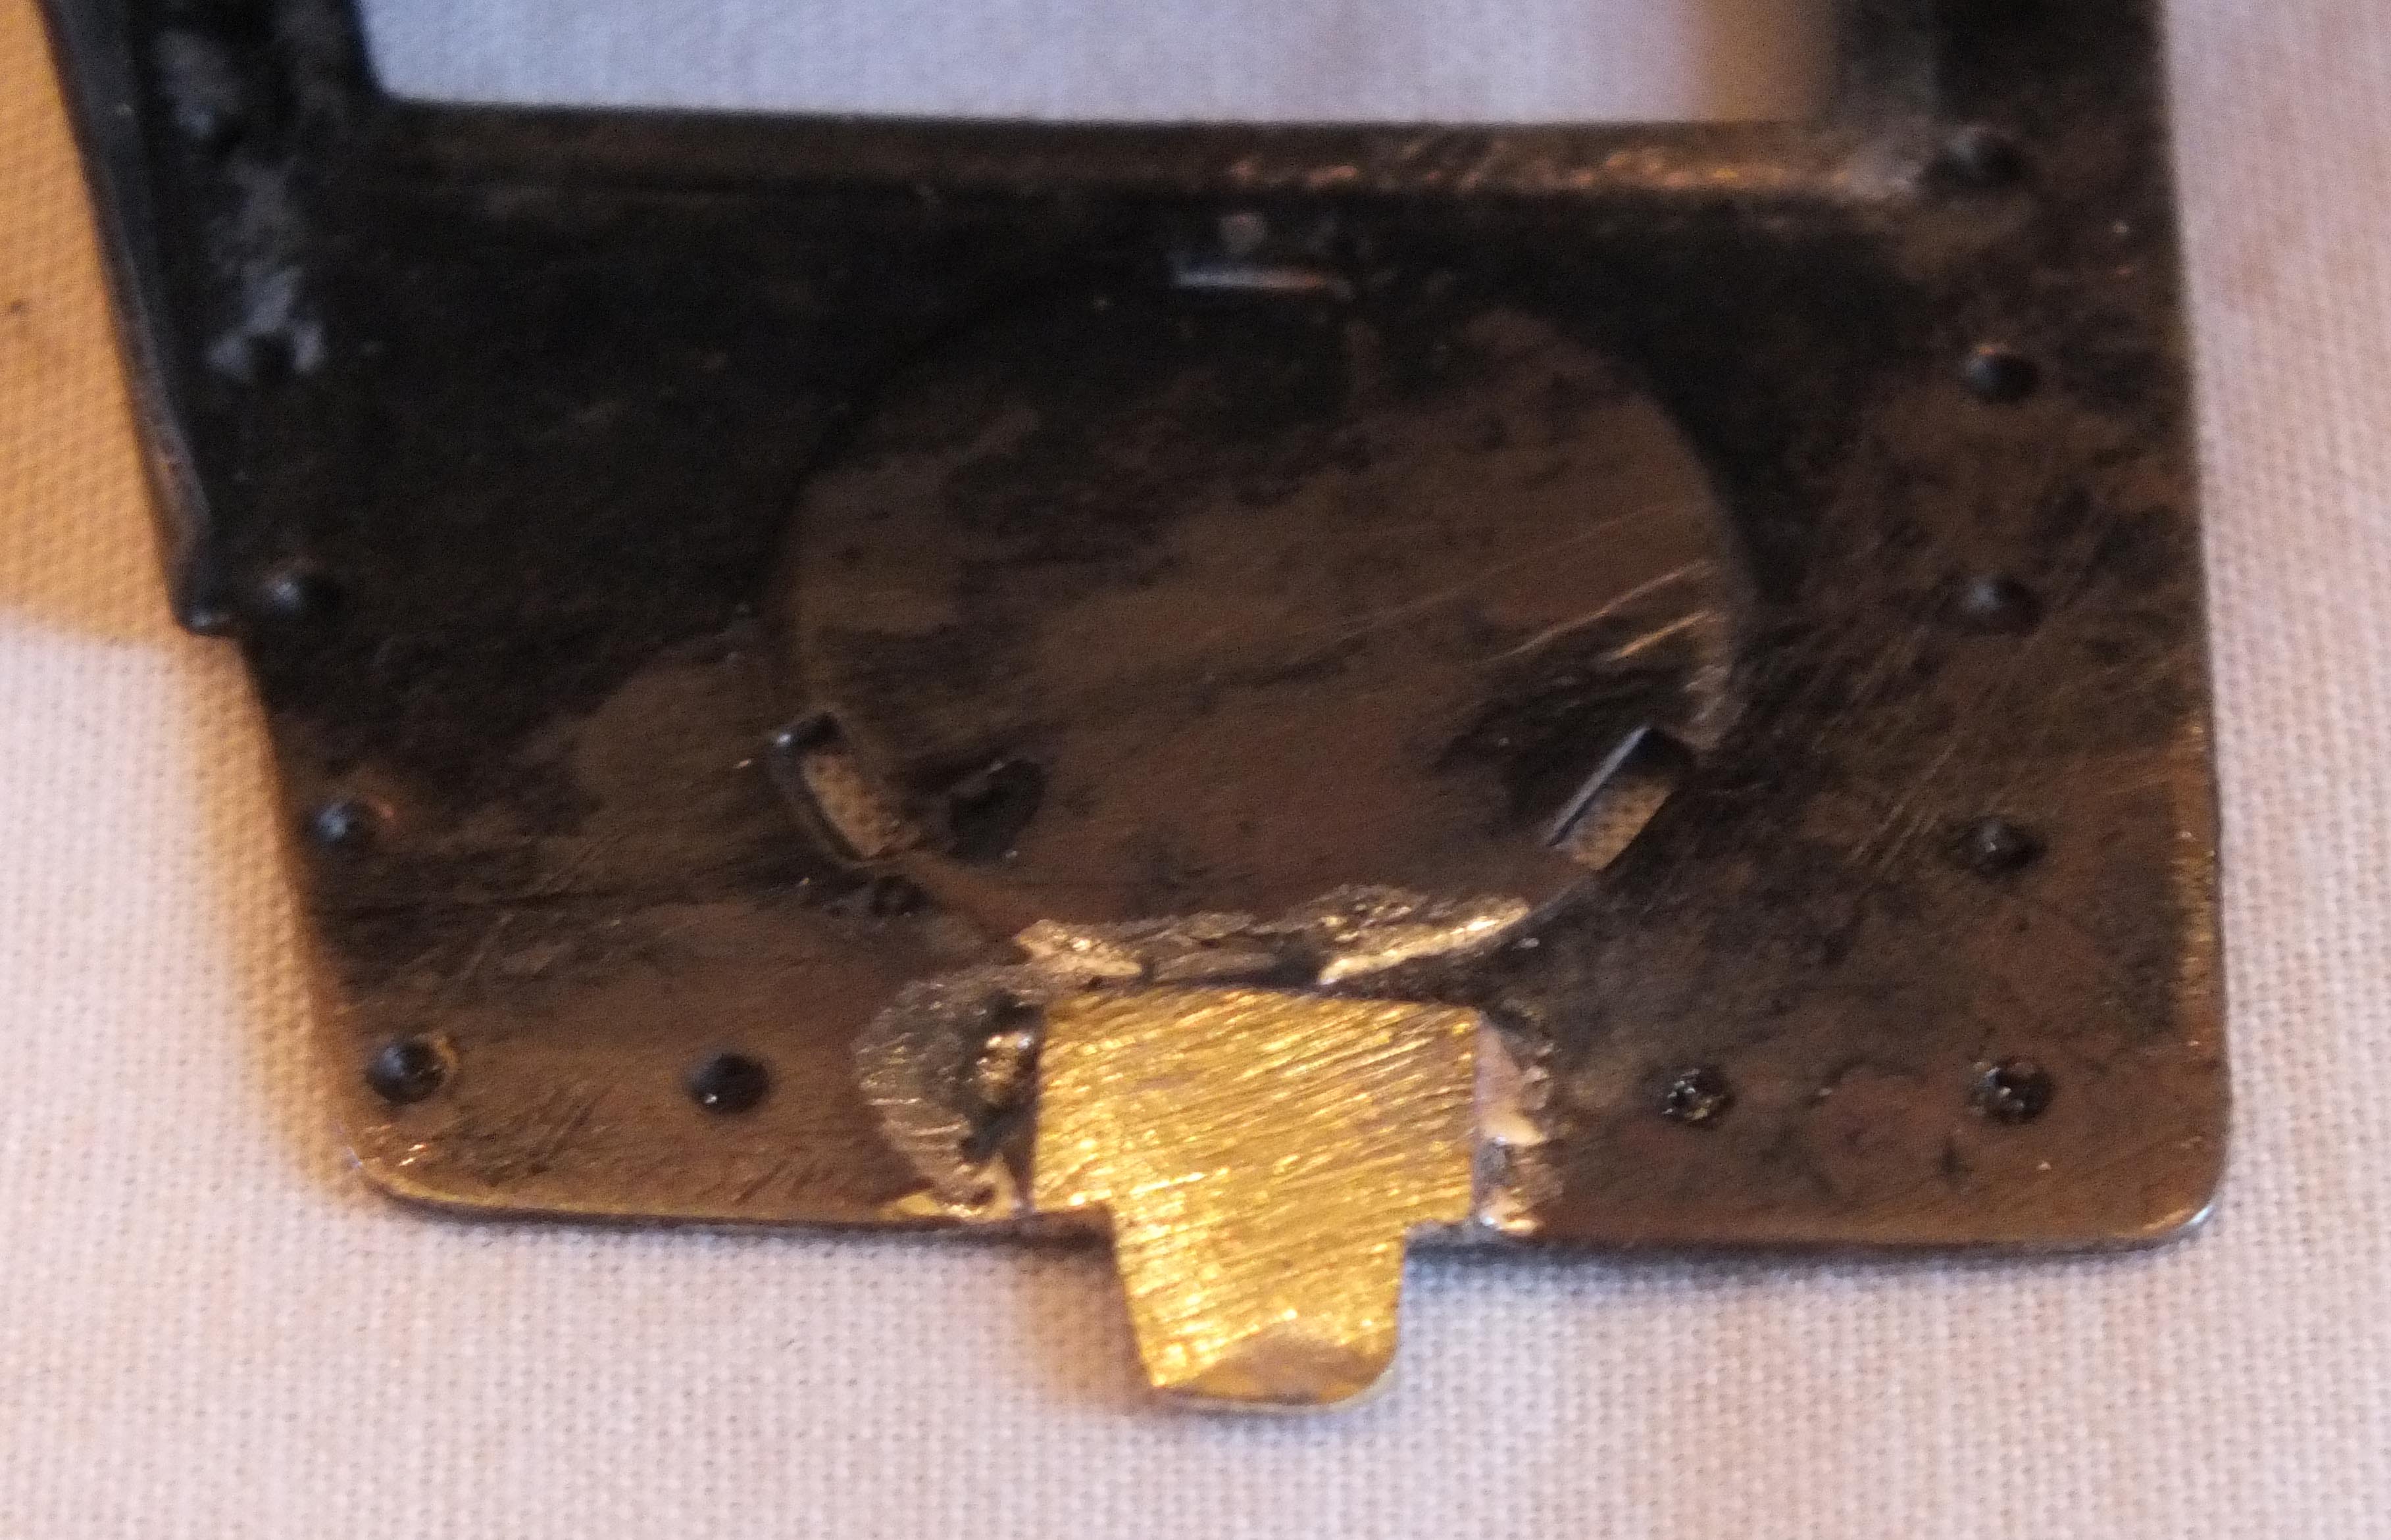
Replacement Cab Tab
The damaged gunmetal cab was carefully straightened. The tricky part was to sort out the complex folding where it fixed onto the firebox shell. This had two reverse bends and required the manufacture of a punch to get into the interior of the cab.
To cure the missing cab tab I soft soldered on a replacement brass tab.

Lionel 261T attacked by tinworm
Lionel 261T repair
The severe corrosion of the curved side sheets of the 261T were repaired by soft soldering on the inside of the curve some thin brass strip. The pits and holes on the outside of the curve were filled by running in soft solder and then using very fine emery rubbed smooth.
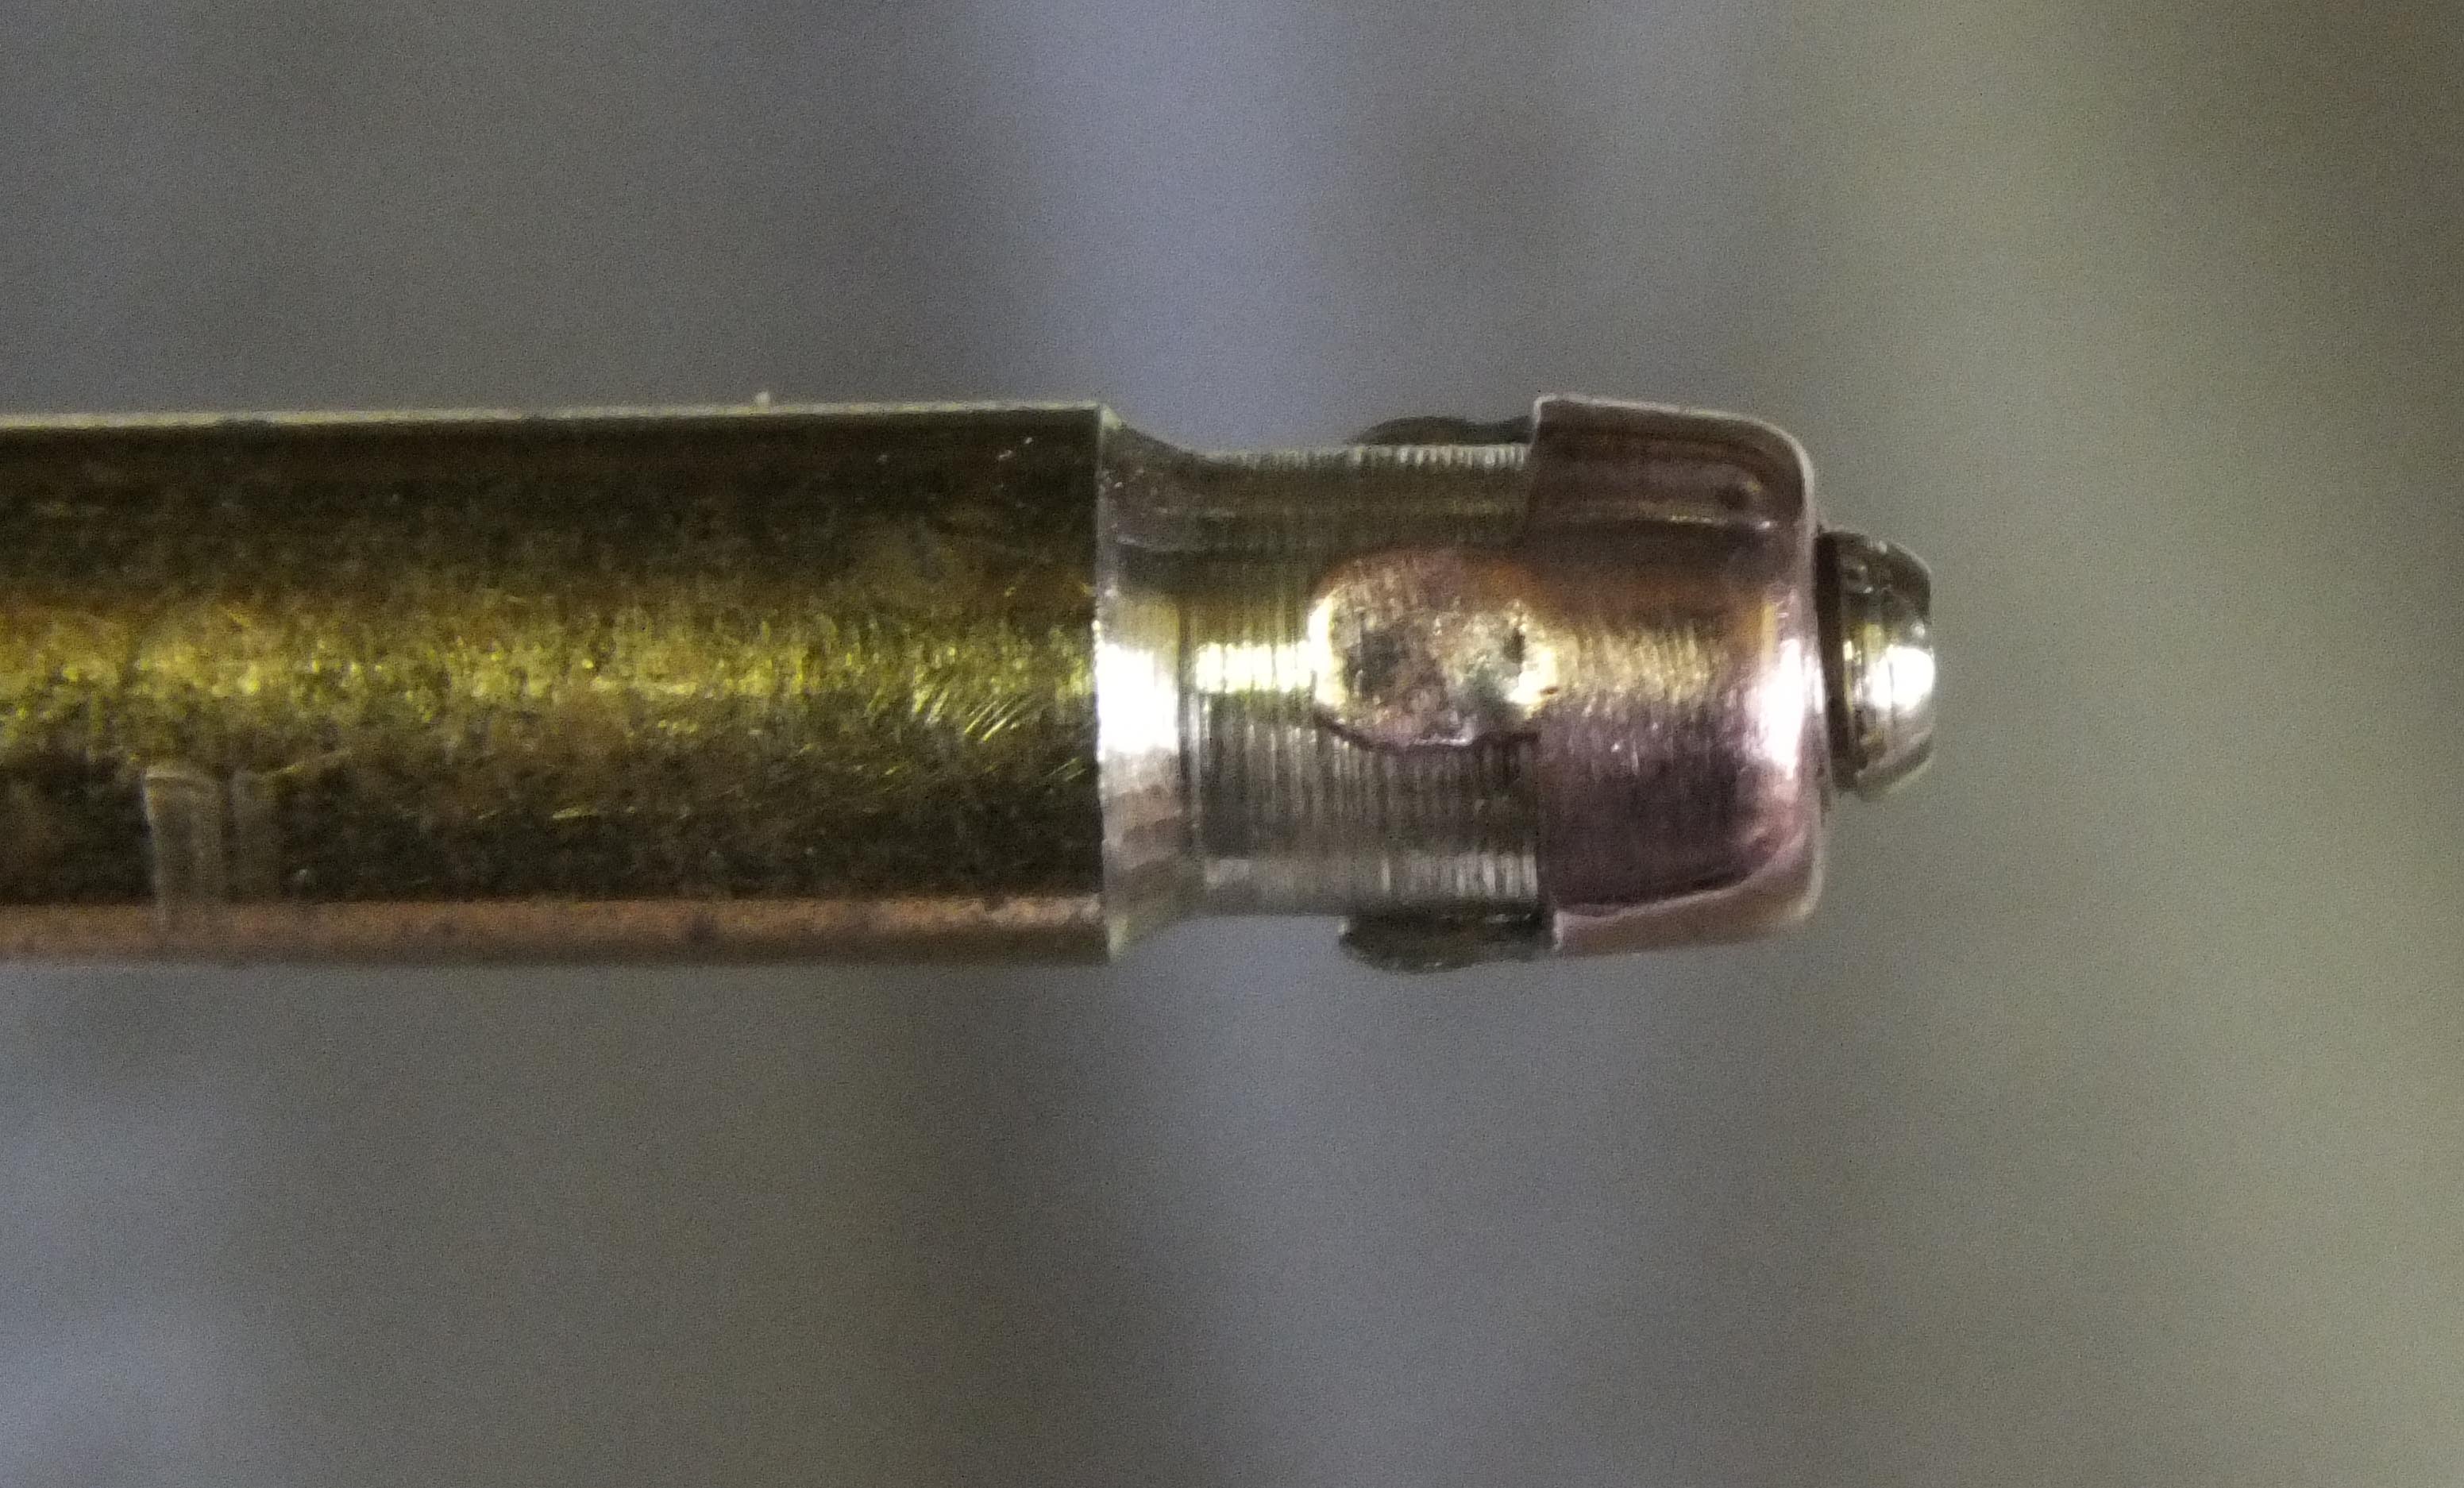
Missing handrail knobs were replaced by carefully bending thin brass strip of the appropriate width to shape.
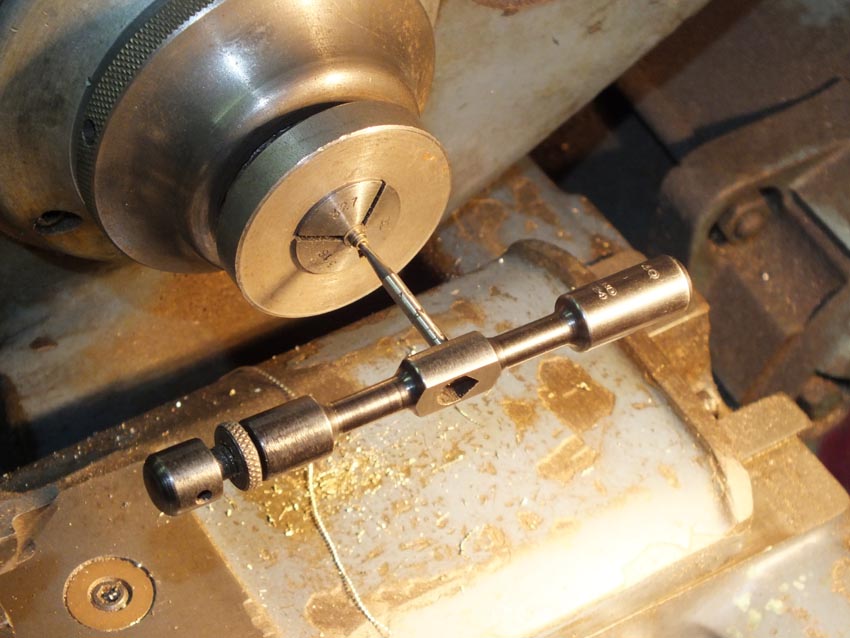
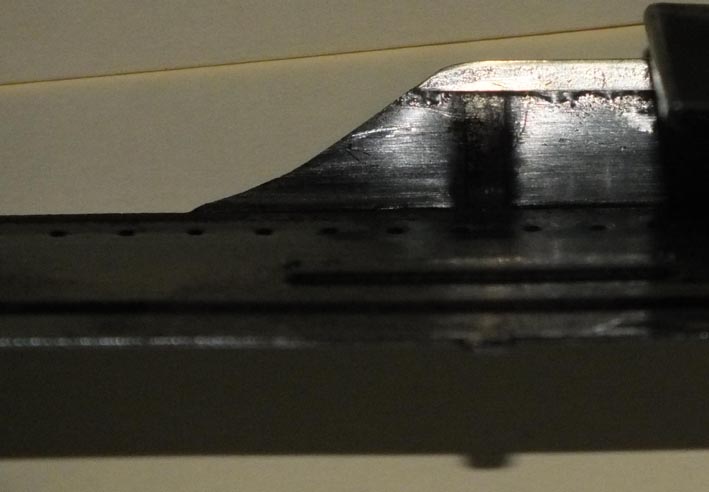
Tapping the motion pin 10 BA
All riveted pins holding the motion work to the frames and the coupling hooks to their frame were removed by filing the burred end until it was flush with the frame and then pressed out. To replace, the rivets were placed in the lathe and drilled through the centre and tapped 10ba. To reassemble, press the rivet back into its respective hole. Then screw a brass 10ba round head and hold in place with ‘Threadlock’. With a small file carefully reduce the head size to match the original burred rivet. Take care not to scratch the paint or plating!
Matching the gunmetal colour was an interesting challenge! According to Halfords all cars are now painted in a metallic finish, so the days of matching using the touch up sprays have long gone. A trip to our local decorators colour matching studio with a Lionel colour chart and a piece of the engine in original paint was met by a very helpful and enthusiastic offer to match the colour. Sadly their efforts proved fruitless as the operative turned out to be colour blind and it cost me £23.00 to establish this! Still, I am sure I can use the paint on something else. The resolution finally came from Craftmaster Paints. They offer a colour matching service and their coach paint is non metallic. Their match was absolutely bang on and the paint is fantastic. I was so impressed I ordered their black paint and clear varnish too.
How to hold the copper pilot lights for cleaning
To clean the smokebox pilot lights and chimneys without crushing them I turned up an insert upon which to hold them in the chuck. It then became a matter of spinning them at high speed whilst polishing them with a Brasso impregnated cloth.

Steel Dome Covers de-rusted
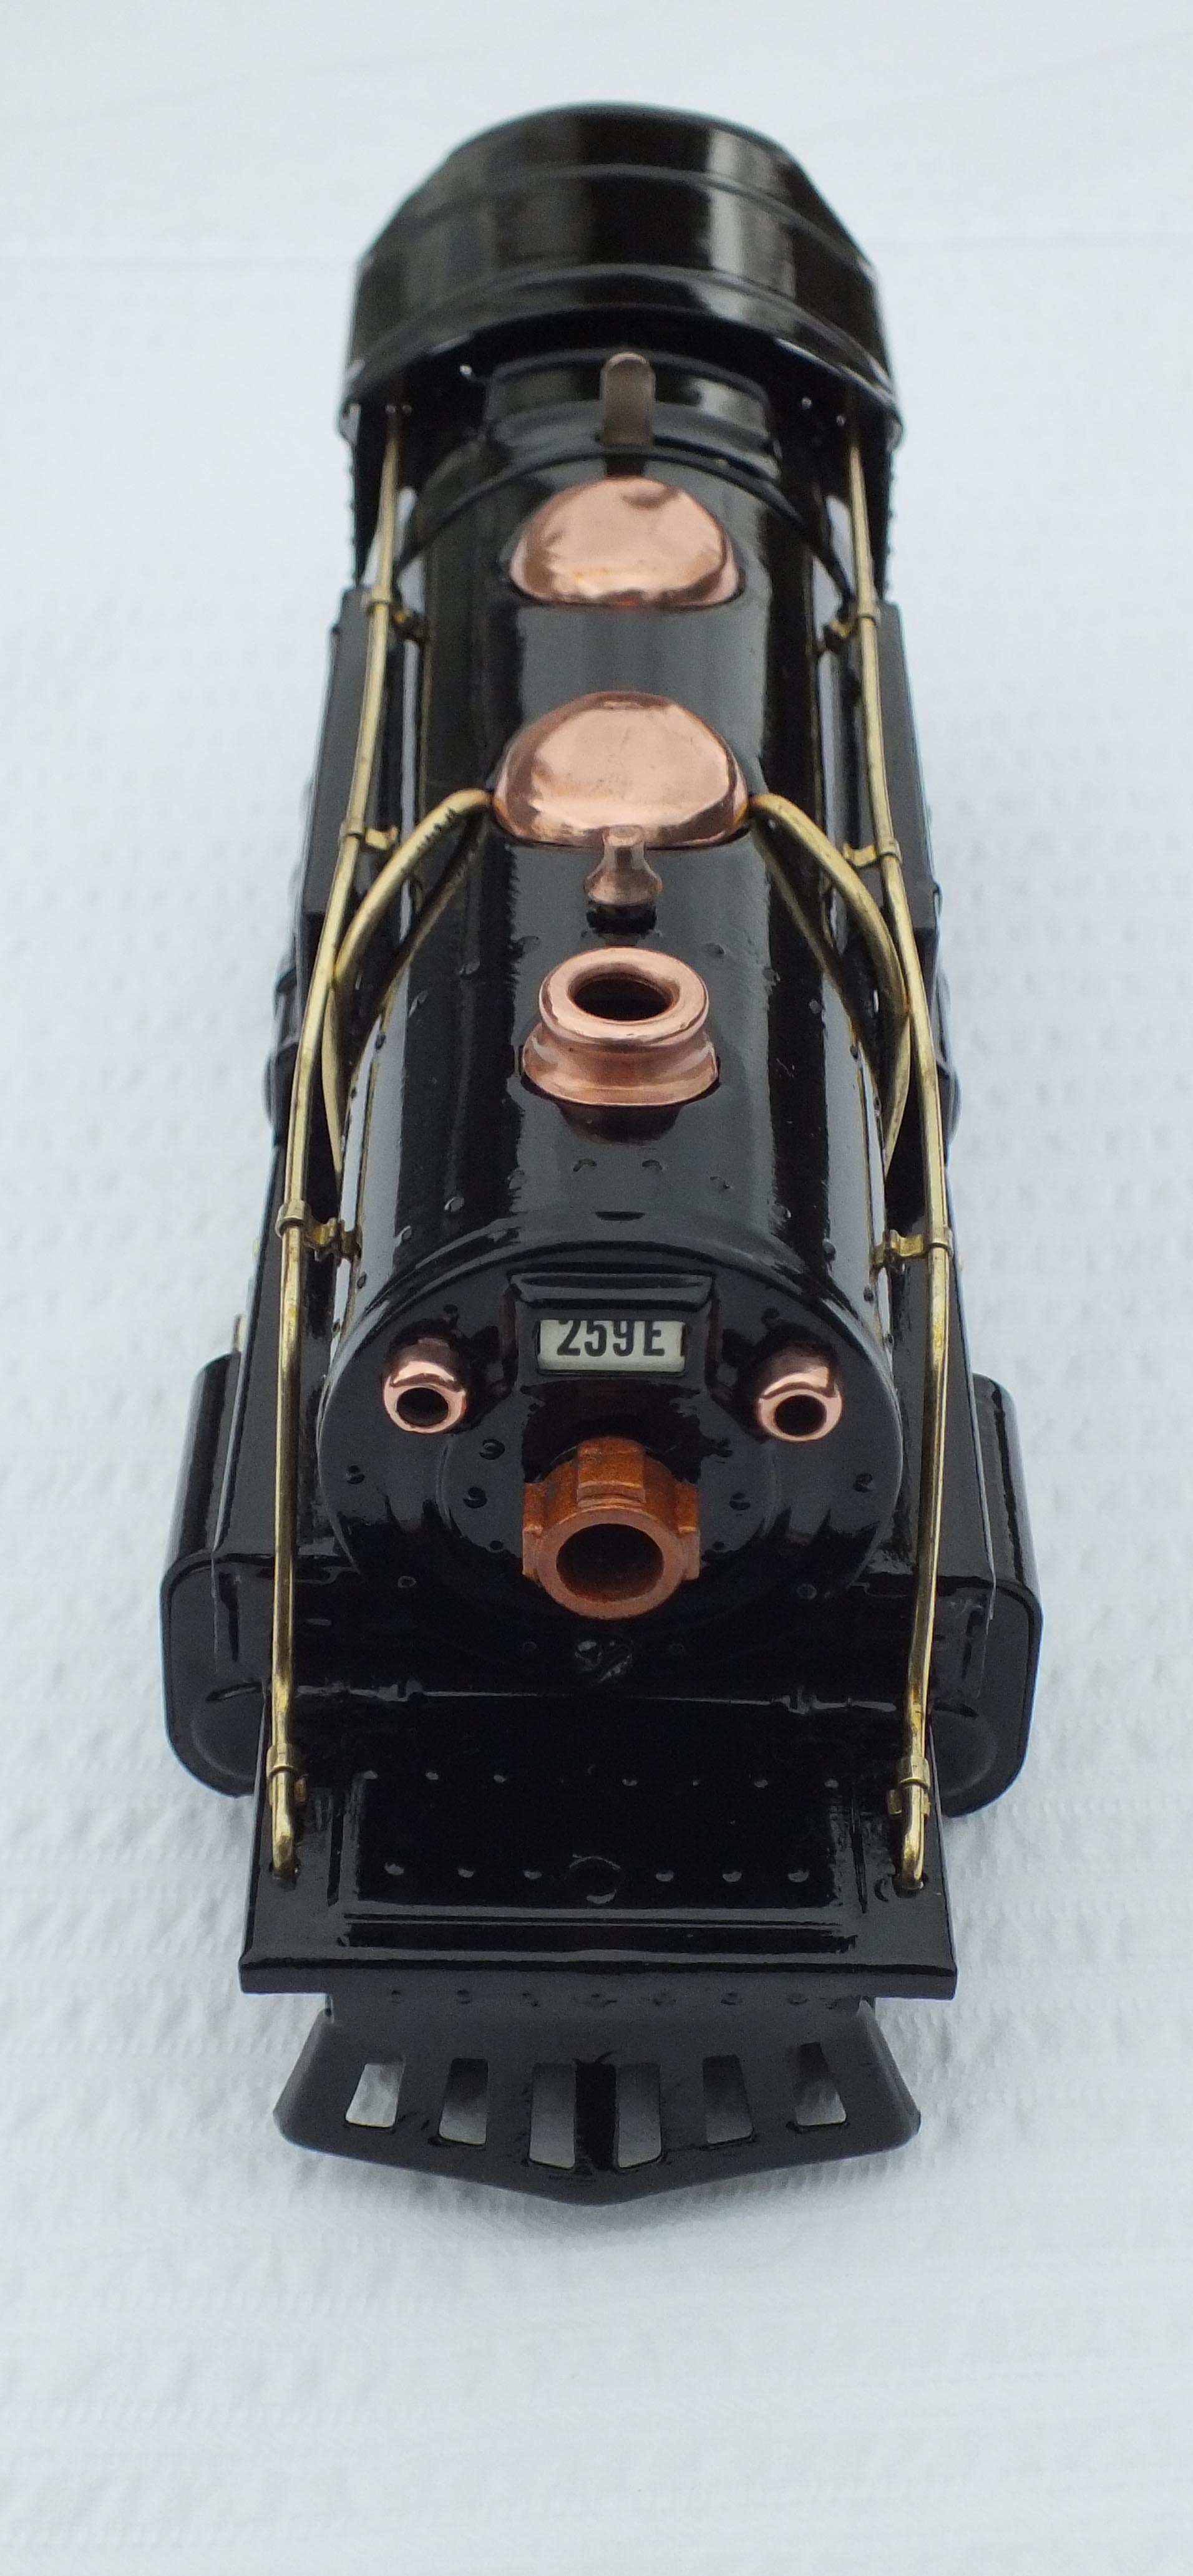
An interesting point of Lionel construction that I discovered concerned the domes. The copper finished locomotive had domes made out of copper.
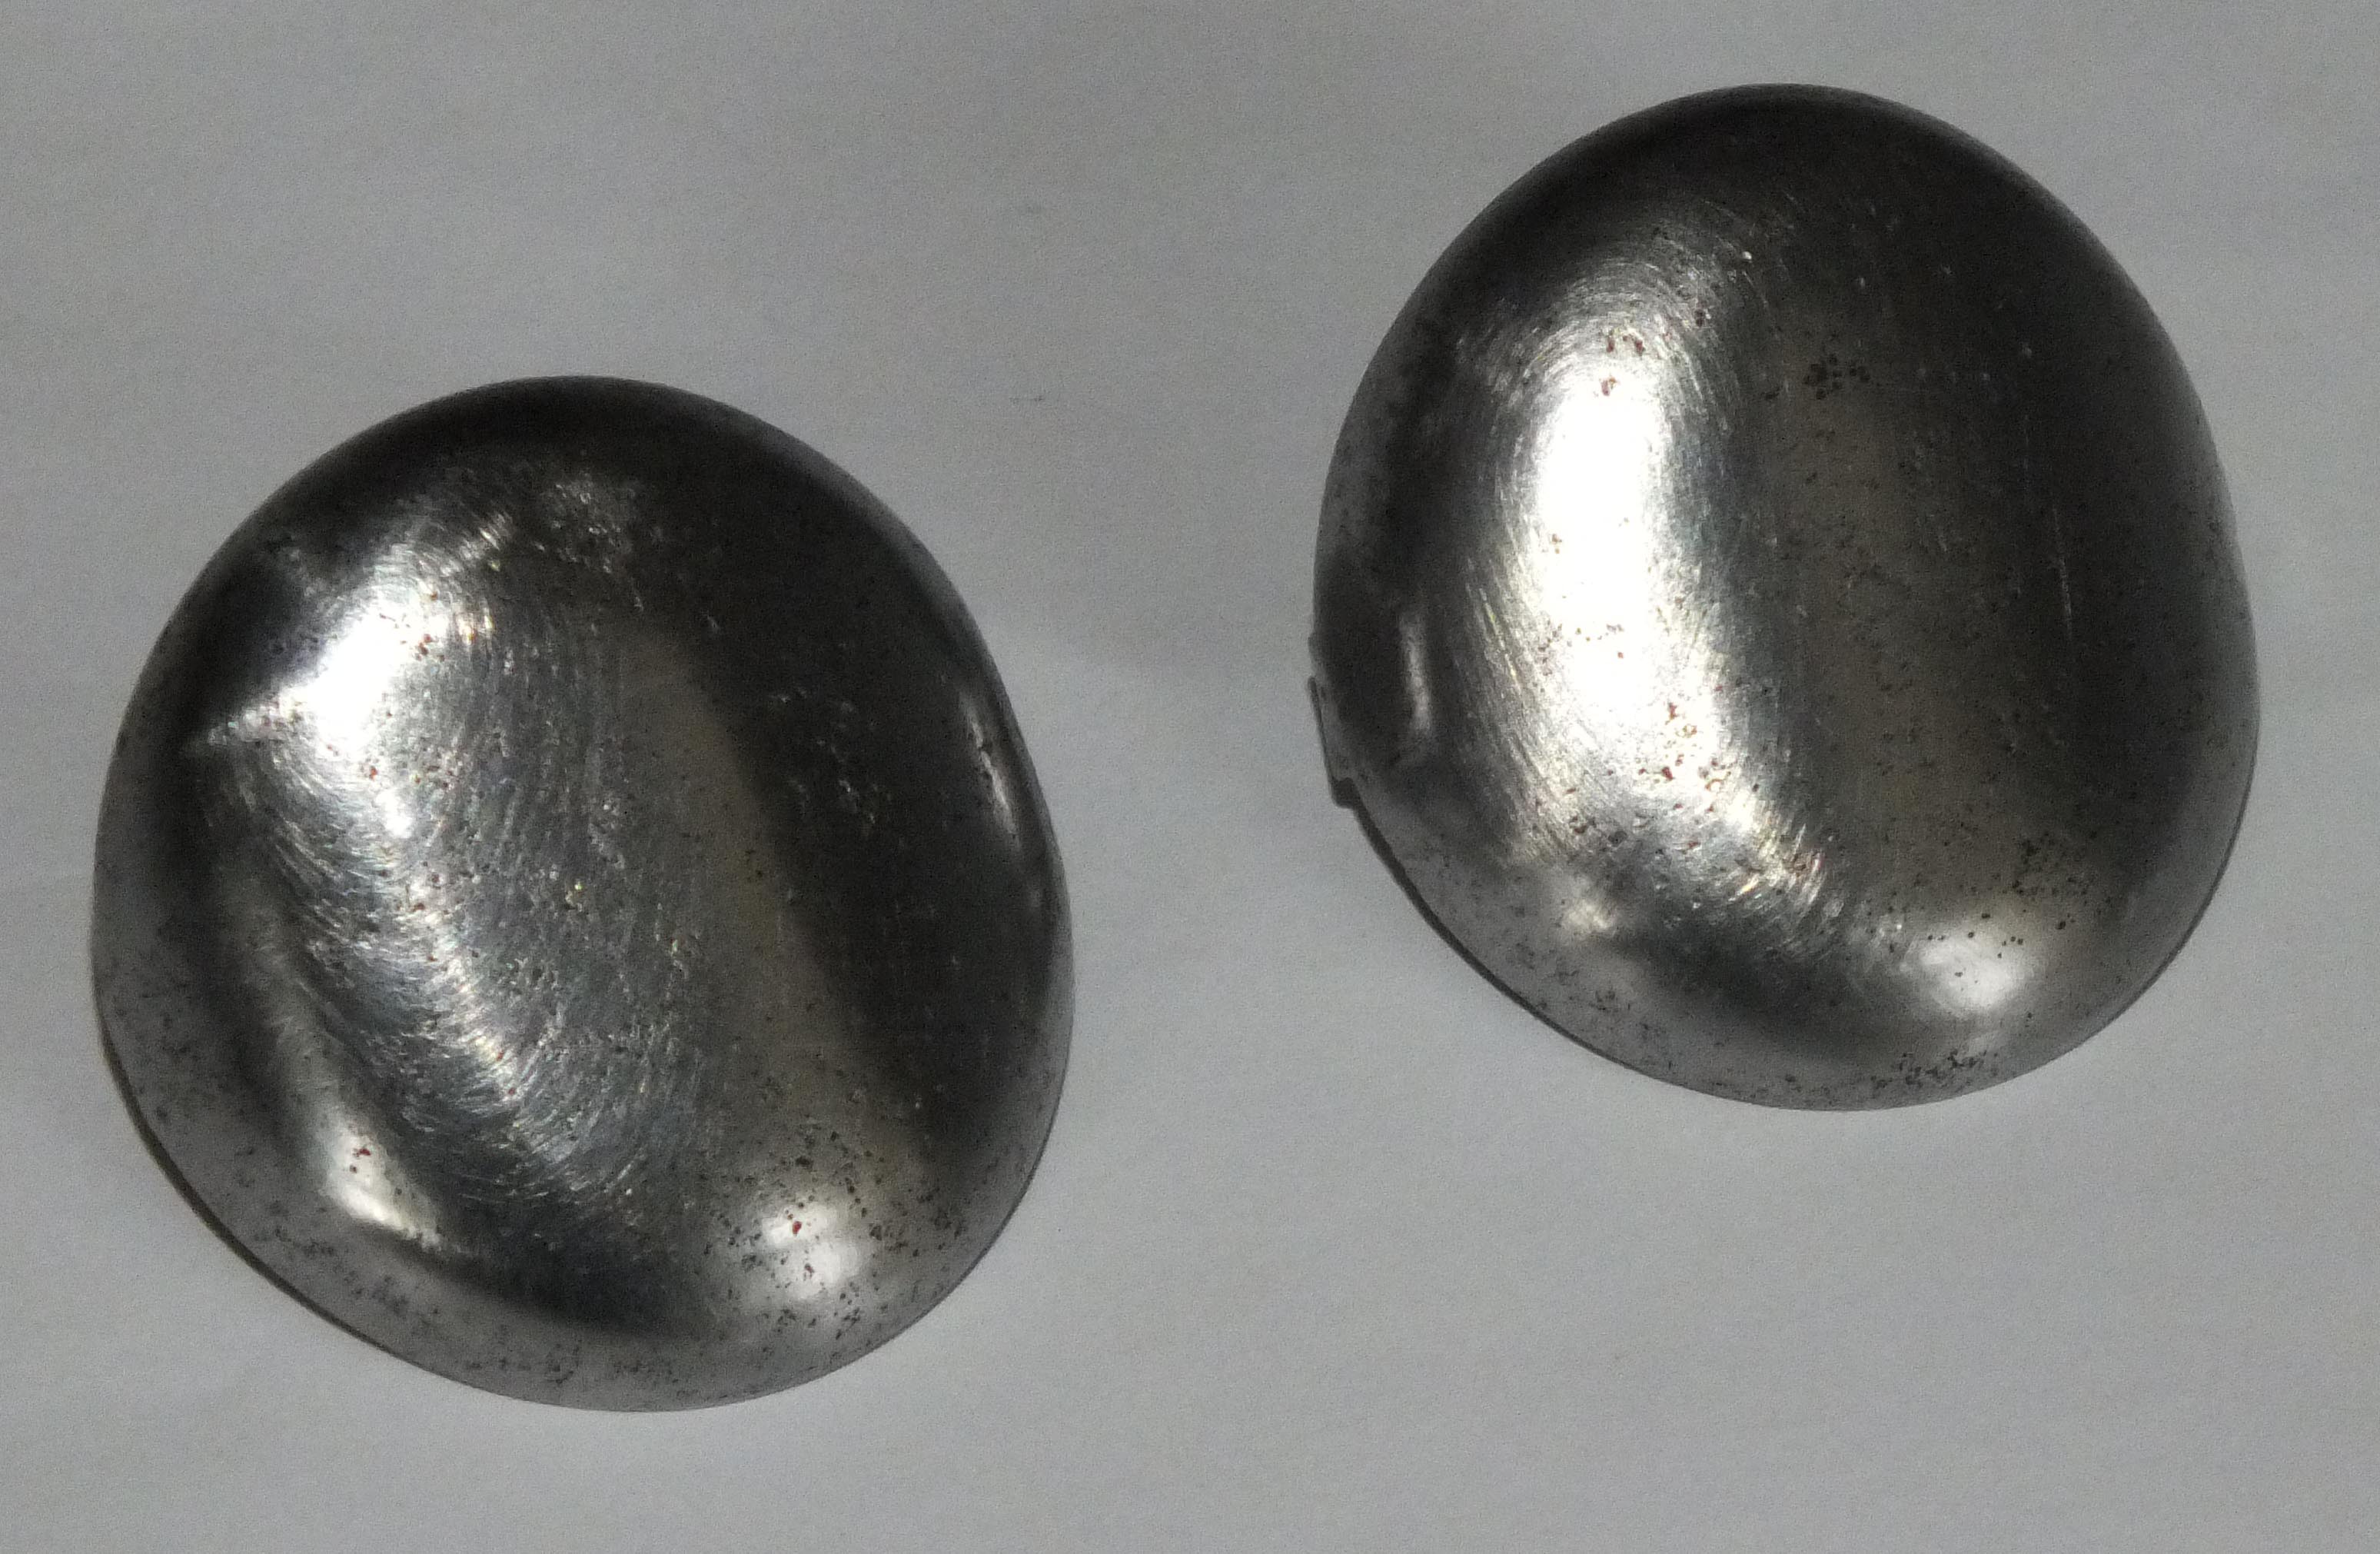
Dome Covers after some elbow grease
The gunmetal /nickel version had domes made out of copper too, but nickel plated. So one would assume that the black/nickel version would, but no, these were made out of steel! Why? Was it to save money? The problem with the steel domes was the rust pitting which had to be removed as much as possible otherwise it would show up when plated.

Nickel Plating Paraphernalia
The nickel plating was undertaken by me. The chemicals are available from a number of suppliers and provided one reads and follows the safety data instructions provided by the manufacturer it is quite safe. For mixing the chemicals and using the de-rusting solution and the pickling solution I wore a chemical mask. You might think this is overkill, but certainly the fumes from the de-rusting solution are noxious and as the solution is used at 70⁰ C or more it does produce a vapour, particularly if the ambient temperature is cool. Without a mask this will make you cough and your eyes water for sure.
The plating part was quite straightforward it just required patience as it takes several hours to deposit a decent thickness of nickel. Fortunately it is a process that once it is running can be left alone to get on with it. Cleanliness and good electrical contact are the secret to good plating. There were just two occasions when I had not got this quite right and I had to strip it off and start again.
There was a missing handrail on the rear of the 261T and the handrail knobs on the gunmetal version. Acceptable replicas were produced by carefully cutting, folding and filing thin ⅛” x ⅛” x⅛” U channel brass tube. This is available from Hobby Stores.

Gunmetal Lionel 259E repainted smokebox & pilot
The body parts that required painting were primed first with Phoenix Precision Paints PQ1 single pack self etch primer and then allowed to dry for a week. After that it was two coats of the Craftmaster coach paint with 24 hours between each coat. The job was then left to harden fully for a week before final reassembly.
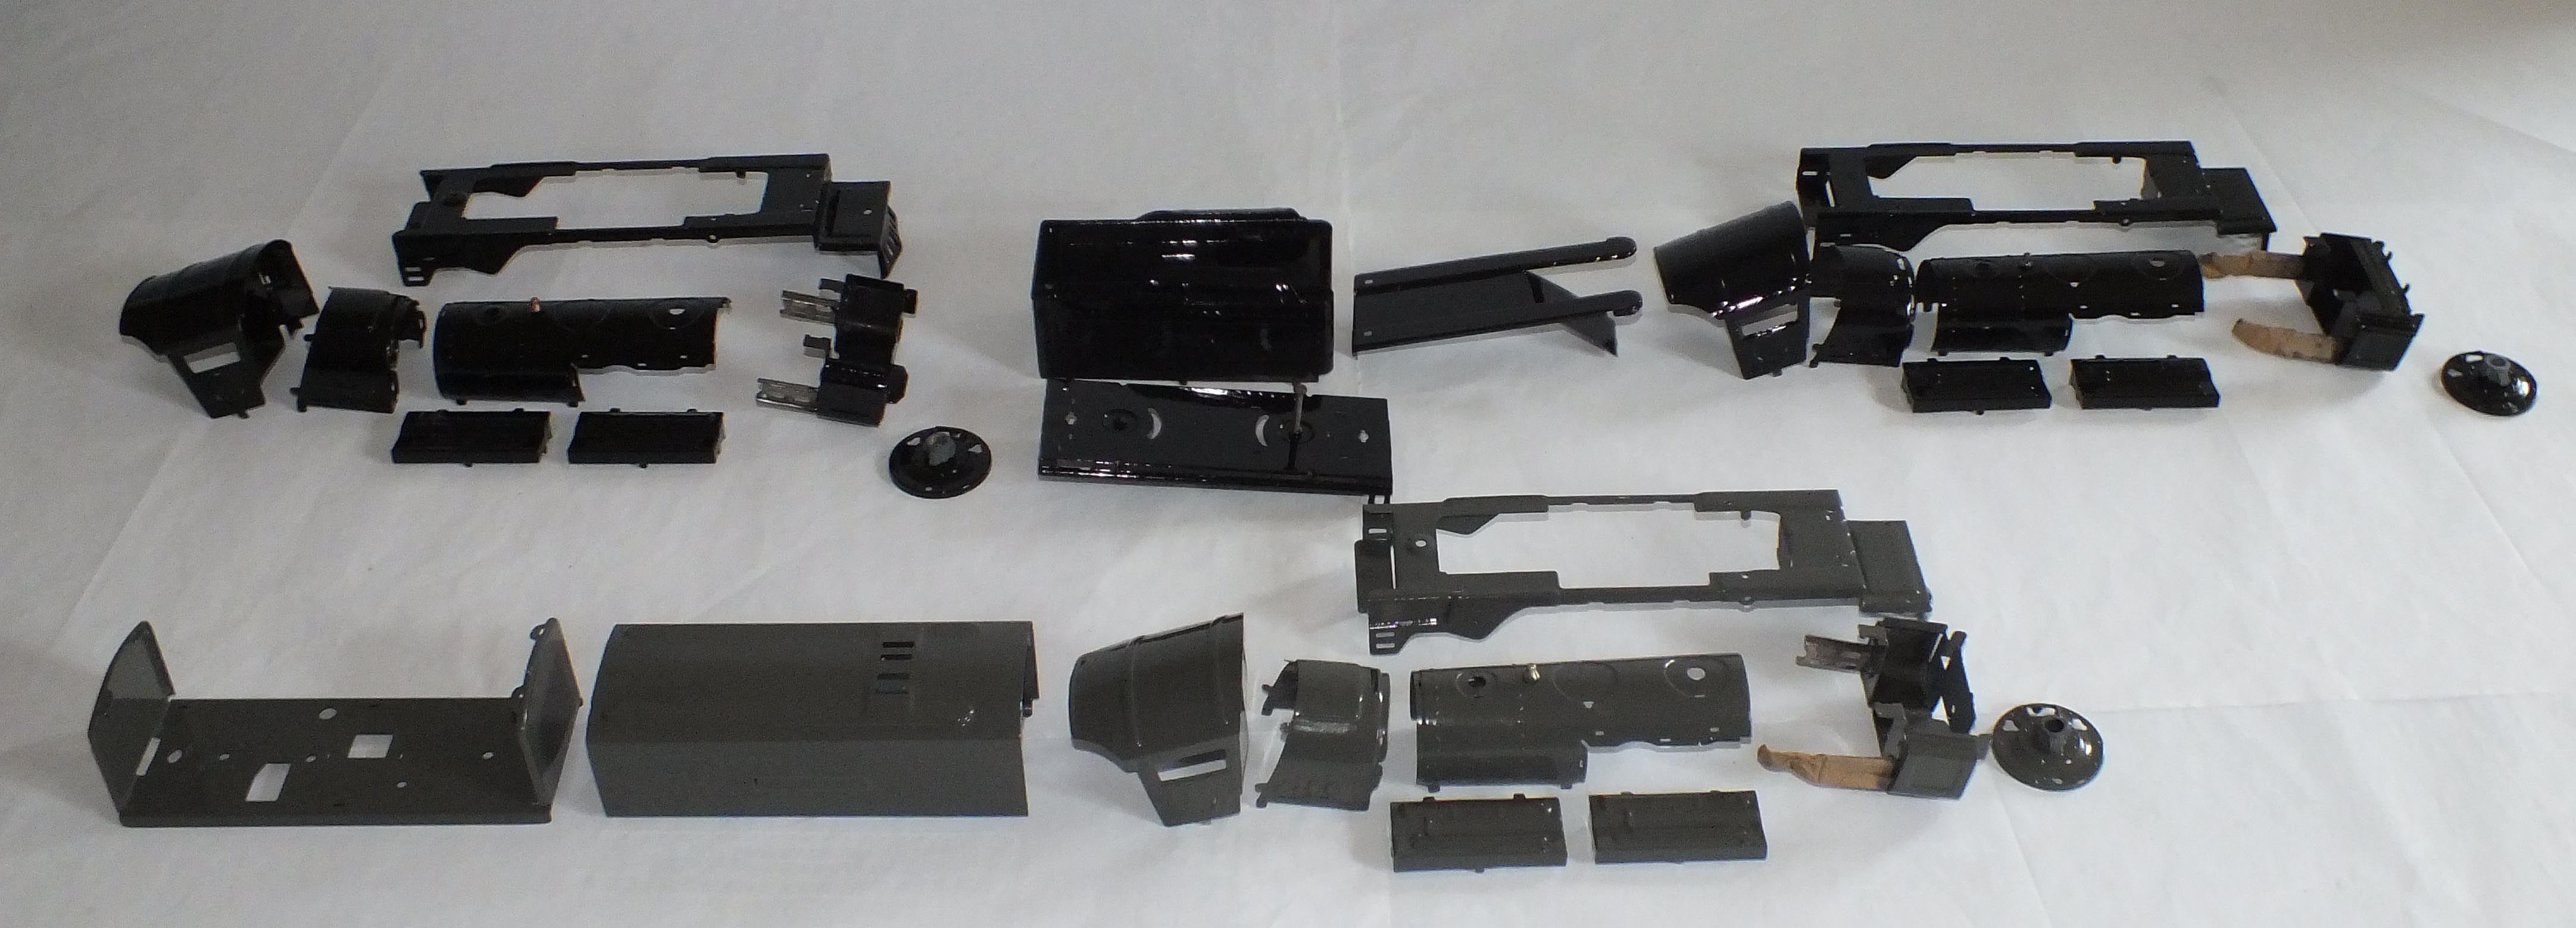
Black & Gunmetal painted pieces
Craftmaster paints provide some excellent tips on their website for getting a good finish. I have been painting models for years and I reckon I know quite a lot about how to do it, but I learnt several things from them about technique which worked a treat. I suggest you read them too.

Three More For The Roundhouse
Reassembly was done wearing a pair of cotton gloves to avoid fingerprints, sweat and grease all over the shop. Tab bending was done VERY carefully as I did not want the screwdriver or pliers to slip and gouge a deep scratch in the paint……
Finally a couple of coats of clear varnish over the dome covers, chimneys and handrails to give additional protection from sweaty hands when being handled.
Job done!
Completed Gunmetal 259E

Black Beauty
“Dear Jeremy
Father Christmas arrived this morning. I was delighted as much today as in 1939.
The engines were fantastic.
Thanks again, John O’B”
Another Black Beauty